How to Install Godot 4 on a Mac
In this article, I will show you how to install the Godot 4 game engine on a Mac.
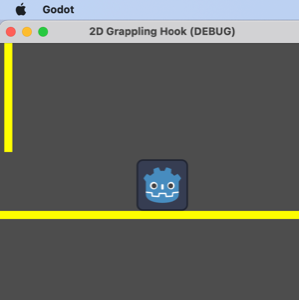
From the Godot examples: 2D Grappling Hook running on a Mac.
In this article, I will show you how to install the Godot 4 game engine on a Mac.
Step 1. Install dotnet (optional)
If you would like to be able to write or build Godot projects using C#, you will need to install dotnet first. To do that, see my previous article:
Step 2. Download Godot 4
To download Godot 4, do the following:
- Browse to: https://godotengine.org/download/macos/
- If you want to use C#, select: Godot Engine - .NET
At the time of this writing, the build works for both types of Macs (Intel and Apple Silicon). So you don't have to choose.
Step 3. Install Godot 4
To install Godot 4, do the following:
- Browse to the downloaded file in Finder
- Double-click it in Finder to unzip it
- Drag the .app to the Applications folder in the Finder sidebar
Later you can go into the Downloads folder and delete the zip file for cleanup.
Step 4. Start Godot 4
To start Godot 4 for the first time, do the following:
- In the Finder Applications window, double-click the Godot app
- You will get a one-time warning that it was downloaded from the Internet
- Click Open to get beyond the warning
- In the Dock, find the app, right-click, and select Options > Keep in Dock
- Back in the editor, you will get a popup that you don't have any projects
- Click Open Asset Library - don't worry if you see nothing, let's fix that
- Click Support (in the upper right of the window)
- Click Community
- The examples should appear
Leave that there for the next step.
Step 5. Download and run a demo
Before you can download and run a demo, you have to create a folder for it.
- Open up a terminal window
- Run this command to create a folder for the demo:
mkdir -p ~/projects/godot/godot-demo
Look through the examples and find one marked "demo."
I selected the one labeled 2D Grappling Hook.
- Select the demo
- Click Download
You may get an error about not being able to save to the path before you do anything.
- Click Browse and navigate to the folder that you created above
- Click Select This Folder or if you clicked into it Select Current Folder
- Click Install & Edit
The demo should load in the editor.
To run the demo, you should see a set of buttons near the top right of the editor. They will look like video controls.
- Press the play button (it looks like a triangle)
- Play around with the demo
Be aware that the demo is in its own window and may end up behind the editor.
Step 6. Setup the command line
In this step, I will show you how to set up Godot to run from the command line on a Mac.
First, you need to determine the correct path to run Godot from the command line.
- Open up a terminal window
- Run this command and instead of hitting enter, hit the Tab key:
/Applications/Godot
In my case, when I hit the Tab key it expands to:
/Applications/Godot_mono.app/
If you got something different (like just Godot.appif you installed the non-C# version) substitute it in the path when running this command next:
echo 'alias godot="/Applications/Godot_mono.app/Contents/MacOS/Godot"' >> ~/.zprofile
This is assuming you are running zsh, which is typical for Macs these days.
- Source the file with this command:
source ~/.zprofile
Verify that the alias is working by running this command:
which godot
In my case, that returns:
godot: aliased to /Applications/Godot_mono.app/Contents/MacOS/Godot
You can try commands like:
godot --version
or:
godot --help
Step 7. Launch from the command line
To launch from the command line do the following in a terminal window:
- Change to the folder where you downloaded the demo:
cd ~/projects/godot/godot-demo
To launch just the build, run this command:
godot
To open the project in the editor, run this command:
godot -e
See the references section below for links to the command line tutorial.
Conclusion
In this article, you learned how to:
- Install and run Godot 4 on a Mac
- Switch on community support to build and run the demos
- Set it up to launch from the command line